Tutorials

Tuesday, December 29, 2009

A New Year is coming!

I know it's been a while since I have posted. It's also been a while since I have created. I guess like most of you, this is a busy time of year that is dedicated to family and friends. I have enjoyed some special moments with my family over the last week or so and am looking forward to more over the next couple of weeks. My postings may be a bit sporadic during this time, but I am sure that you understand!

Here is a sweet little calendar I whipped up on Christmas Day (there's always something that's left to the last minute, isn't there?) I made the calendar to match THIS bookmark for my friend, Stacey.


This calendar was designed by Tracey Old who is a design team member for Ustamp YEBO. I have got some much inspiration from Ustamp with Dawn and Friends.

Card: Lovely Lilac, Sage Shadow, Very Vanilla
Ink: Sage Shadow, Pale Plum, Lavender Lace, Perfect Plum
Punches: Eyelet Border, , Butterfly
Ribbon: Elegant Eggplant 1/4" grosgrain
Embellishments: Clips Assortment
Stamp Sets: Organic Grace, Butterfly Prints, Great Friend (retired)

This will be my last post for 2009. I hope that 2010 brings you joy and happiness and great health and wellbeing.

Till next year, happy stamping...

Tuesday, December 22, 2009

Circle Scissors card

Oh no! A card without stamping.... what's happening to me!

This card has been made for a young boy who is turning 11 day, so he is allowed to apply for his firearms licence which is something that he has been wanting to do for the last 18 months. Trying to make cards for boys really throws me, since I have two daughters. I thought I'd attempt to make a target, using the Circle Scissors and Sweet Treat Cups from the Summer Mini.


I used an eyelet put in backwards (yes it was intentional) to look like a bullet hole and this is holding the backing for the sweet treat cup. The circle dot in the middle was centred, but the angle of this photo makes it look like it isn't.


I had to run this card by my husband as I built it to get approval for how targets look! I think he was impressed in the end.

This card was super easy to make and didn't require many items to build. Gotta love that!

Card: Basic Black, Whisper White
Embellishments: Sweet Treat Cups, Metallic Eyelets (retired)
Tools: Circle Scissors

Till next time, happy stamping...

Monday, December 21, 2009

Hexagon Boxes

Well it's that time of year, when there are presents galore and the old square or rectangular box is getting a bit boring. Krystina Gerke designed these boxes for Ustamp with Dawn and friends. Of course, I decorated them my own way!

Have you not heard of Ustamp with Dawn and friends? Click on the link and learn all about it. Basically you join up and each day a new tutorial is put up. Now who doesn't like to learn something new each day? The tutors are from all over the world, so it's fascinating to see what is being made elsewhere.


These boxes were filled with chocolate coated sultana's and a little poem on the tag reads:

Santa's heard that you've been bad
So listen here's the scoop
All you're getting for Christmas
Is this bag of Reindeer Poop!


I don't know who the author is, but I love the cheekiness of it!

Card: Baja Breeze, Chocolate Chip
Ink: Real Red, Baja Breeze
DSP: Parisian Breeze (retired), Ski Slope (retired)
Ribbon: Chocolate Chip 5/8" grosgrain, Riding Hood Red 5/8" striped grosgrain, Linen Thread
Punches: Scallop Circle, 1" Circle, 1 3/8" Circle, Designer Tag, Small Tag
Embellishments: Rich Regal Eyelets (retired)
Stamp Sets: Best Yet, Spotlight on Christmas

Till next time, happy stamping...

Sunday, December 20, 2009

A last minute christmas card!

Well, there is always one more christmas card that you have to do! You know that feeling when you think you've finally conquered Mount Everest and posted the millions of cards out, and then suddenly you realise that you missed someone? I didn't really miss this person, I just wanted to make a special card for them.


I had previously made a gift box for someone with an apperture and had cut the apperture too small. When I re-cut the apperture to the correct size, I ended up with this nifty little border and that's how this card started.

Card: Whisper White, Night of Navy, Baja Breeze
Ink: Kraft White, Night of Navy, Real Red, Basic Black
Ribbon: Basic Grey 3/8" taffeta
Stamp Sets: Tree Trimmings (retired), Short and Sweet

Till next time, happy stamping...

Tuesday, December 15, 2009

Amazing Inventory Clearance!

I can't beleive how great Stampin' Up! is. They are having an Inventory Clearance SALE from today until 24th January 2010.

There are select Alphabets set for only $38.98 (down from $77.95). How cool is that! Some glitter, hodgepodge hardware, DSP and ribbon is up for grabs too! And heaps of fantastic stamp sets!

Click HERE to see all the great bargains.

There is no minimum purchase or limit to the amount you can buy! But you will have to get in quick as these discounted products are only available while supplies last!

Contact me now to place your order!

Till next time, happy stamping...

Monday, December 14, 2009

Wedding Invites

I guess you are wondering why I haven't been posting much of late. But I have been busy making wedding invites for my brother and his lovely fiancee's wedding. You can see that I have a countdown blinkie on the right hand side of my blog, which says that there is only 2 months till the actual wedding. So the deadline to have these posted is TODAY!

This invite was easy to make, but since everything was hand cut and done individually it took myself and two of my friends hours to make them. I am really happy with the final effect and they look quite stunning.


I have overlaid the rings over the actual details of the wedding, so please don't think this is part of the invite. Just my way to have a little privacy for the bride and groom.

Card: Night Of Navy, Baja Breeze, Silver Metallic
DSP: Bella Blue
Paper: Vellum
Embellishments: Rhinestone Brads

Till next time, happy stamping...

Sunday, December 13, 2009

Blog Hop Candy Winner is...

Lynda wrote

"Heya Leonie,

As instructed.. .I am reporting in to u to claim my.....I-did- the-blog- hop-and-I- have-not- worn-my-fingers- to-the-bone prize...LOL! !!

For me I started this AM (Fm Nicoles Blog....Stampin Down Under).....and went fm there....granted a wee convoluted, but I enjoyed it completely. Good news is I MADE IT!!

I also realised that I was familiar with a lot of ur special ESAD ladies...just was not aware how many of them wer PART of the group..LOL!!

For me the stand out products wer "Butterfly Prints" with co-ordinating punch (woo hoo), Kaleidoscope DSP and the circle cutter. However I also saw things on the blogs that I had glossed over in the catty , but found myself going back for a 2nd look!!

You haev my sincere thanks for co-ordinating such a HUGE event and I hope now that u can put ur feet up (relishing the cooler weather....yeah) and sip on a latte or 2!!

Yours in crafting,Lynda xx"


Congratulations Lynda on hopping to all those sites and leaving a message. And thanks to everyone else who hopped along too! This is the candy that I am sending to Lynda to say thanks for joining in the fun. And she will receive parcels from other members too! I say that Lynda's Christmas is going to be a happy one!

If you missed the blog hop , you can click here to start the ESAD Summer Mini blog hop tour.


Now I believe that we all had so much fun that we have decided to do another one in January for the Sale-A-Bration promotions. Be sure to come back in January to check that blog hop out too!

Till next time, happy stamping...

Monday, December 7, 2009

For a special friend...

Well this post includes a card and a box! Double whammy!

Despite being a demonstrator, I don't own the whole catty... yet! So occasionally I have to borrow some sets from friends of mine. We decided that we would set a new rule, that if you borrowed a set, you had to make a card to go back with the set upon return. Recently I borrowed Loads of Love Accessories from my friend, Julie. I struggled with how to make a card using 'only' this set to go back, as I didn't want to team it up with Loads of Love (although that would have made a great card too).

This is my offering;


I stamped the presents along the base of a piece of cardstock, using my Stamp-A-Ma-Jig to line them up and space them (or non space them) neatly. I then built my card around this. I tried to make it look like a shop front, although I am not sure how successful this strategy was.

I have also borrowed a couple of other things, like the tag punch, so I thought that I would make a sweet box to return the goodies in. I really enjoyed making these items, as I know how much they will be appreciated!

Card Ingredients:

Card: Elegant Eggplant, Pretty In Pink, Rose Red
DSP: Sweet Always
Ink: Elegant Eggplant, Lavender Lace
Punches: Designer Label, Word Window, Scallop Edge Border, Photo Corners
Ribbon: Elegant Eggplant 1/4" grosgrain
Embellishments: Flower Assortment Designer Brads (retired)
Stamp Sets: Loads of Love Accessories, Fun and Fast Notes

Box Ingredients:

Card: Pink Pirrouette, Pumpkin Pie
DSP: Sweet Always
Ink: Elegant Eggplant
Punches: Small Tag, Round Tab, Tag
Ribbon: Pretty In Pink 1/4" grosgrain, Hemp Twine
Embellishments: Flower Fusion, Flower Fusion Too, Circle Fire Rhinestone Brads
Stamp Set: Best Yet

Till next time, happy stamping...

Sunday, December 6, 2009

I finally finished my advent calendar!

I decided that I'd make an advent calendar this year. I purchased a pre-cut MDF box to assist me with this. Unfortunately there were no instructions in the package, so I have fumbled about and worked out how to put this box together. I now know, that MDF expands when painted. I had to file back all the tongues to fit in the grooves, in order to construct the box!

I loved the way I was able to use our adorable DSP and inks to create this calendar.


It's probably a bit difficult to see in the photo, but the ornaments from the Tree Trimmings set and the 3D snowflake are hanging from the top of the box.

I am not going to list all the ingredients for this project as it is such a mixture and some of the items used come from my stash or my friends stashes and have been there that long, that we would only be guessing their origin.

Till next time, happy stamping...

Thursday, December 3, 2009

A gorgeous box!

Well we all know it's that time of year, when we are handing out presents left, right and centre! Earlier this week the local craft group that I belong to had our Christmas party and we all had to bring a Secret Santa present! Now I don't think it was a secret that it was from me!

I had joined Ustamp with Dawn and Friends Holiday Season (now closed) and Jenny Moors provided the tutorial for this gorgeous box! It even has a little window on the top, so you can take a peek at the gift inside.

This box was super quick to make! The decorations were simple to make, as the Spotlight on Christmas stamp set, has five co-ordinating punches that go with it. So I have a special deal on for the next week, finishing 10th December 2009. You purchase the Spotlight on Christmas Bundle for $163.75 delivered to your door.

This bundle includes:

Spotlight on Christmas Stamp Set
1 1/4" Circle Punch
1 1/4" Square Punch
Large Oval Punch
Large Star Punch
5 Petal Flower

That's $194.70 worth of product for $163.75.

Alternatively my second bundle include all the punches detailed above for $123.80.

That's receiving a punch for free if you take up either option! *Postage fees apply.

Perhaps you might want to leave a bookmark on this page for hubby to find! For more information or to place an order, please email me!


Card: Baja Breeze, Real Red, Whisper White
DSP: Ski Slope (retired)
Ribbon: Riding Hood Red 1 1/4" striped grosgrain, Old Olive 1/4" grosgrain
Punches: Small Tag, Large Oval, Large Star, Designer Label, 1 " Circle, Horizontal Slot
Stamp Set: Spotlight On Christmas

Till next time, happy stamping...

Tuesday, December 1, 2009

ESAD Summer Mini Blog Hop

Hello and welcome to my blog.

Today you have either stumbled across or been informed about the Blog Hop that the ESAD group is having. So who is ESAD? We are a group of "Extremely Special Australian Demonstrators". We have our own yahoo group and we share ideas and provide support and friendship to other demonstrators. We have regular chats, challenges, swaps and tech talks.

If you are an Australian or NZ Stampin' Up! demonstrator you can join our group. Click here for more information. If you aren't a demonstrator and are worried about missing out, contact me and I'll can fill you in on many more benefits that you'll receive by being a Stampin' Up! demonstrator.

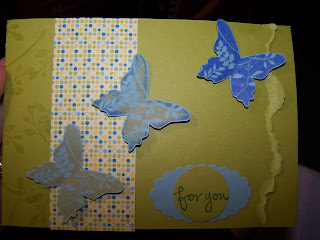
I am showcasing a card using the stamp set, Butterfly Prints, and co-ordinating punch from the Summer Mini. I just love that this punch also co-ordinates with Flight of the Butterfly from the Ideas Book and Catalogue.

I used the emboss resist technique to build this card. To do this, you need to emboss an image onto your cardstock using clear embossing powder. Then you go over it with ink. I used my brayer to ink this cardstock. I then used a tissue to wipe the excess ink off the embossed images. The best part is that the ink gets into the little cracks in the embossing and leaves a reverse image.


Card: Whisper White, So Saffron, Taken With Teal
Ink: Elegant Eggplant, Taken With Teal, so Saffron, Versamark, Rose Red
Ribbon: So Saffron 5/8" grosgrain (retired), Elegant Eggplant 1/4" grosgrain
Punches: Butterfly, 1/2" Circle
Tools: Embossing Buddy, Embossing Pals, Heat Tool, Clear Embossing Powder
Stamp Sets: Butterfly Prints, Short and Sweet

Be sure to remember to add a comment to every post that you visit on this blog hop as you may win some BLOG CANDY for your efforts! There are about 30 blogs in total to visit, so grab a cuppa, set the kids up something that will entertain them for a while and enjoy our blog hop. After you have visited every blog, you will end up back at the first. Once you are there and have commented on every blog, please email Leonie to be entered into the blog candy draw.

Alright the next blog to visit is the very clever Steph Pikes.

Till next time, happy stamping...

Friday, November 27, 2009

November Cyberstamp Over

Well I think this will be my final entry regarding the November Cyberstamp. Honestly it was so much fun.

As I said in an earlier post, I was asked, by Tanya Kitto, to present a challenge. Tanya has been instrumental in organising these cyberstamps and chats over the last six months, and it was great to be able to give her a hand.

You can imagine my surprise when I received a parcel from her to say thanks. I was gobsmacked by this sweet little bag she had made for me and filled with some beautifully decorated soap, a covered notepad (with a beautiful personal message on the inside for me) and a cute little post it pad. You wouldn't know but it's already been used.... I just couldn't wait.

This gift was so thoughtful, so this is also my public thank you to Tanya. You are an inspiration to me. Your work is stunning and your commitment to ESAD and ESAD-NING is muchly appreciated.


Okay, so that was a great parcel to receive. And then the mail came.... and low and behold there was this sweet card for me from Carole Stedman for winning her scrapbook challenge. Again here is a public thank you to Carole. Your card has made me like the Upsy Daisy set even more and I have put it on my wish list. Thank you for setting the challenge, I enjoyed pushing myself outside my comfort zone.


Alrighty then. Well I am guessing this will be my last post for November. I can guarantee that I will have a post up by 6am on 1st December 2009. This year I am participating in a 'blog hop'! I will have a post up and at the bottom will be a link to another ESAD members blog and at the bottom of their post there will be another link. There will be about 23 blogs to visit. All of these posts will be showcasing the new product coming out in the Summer Mini on 1st December 2009.

Of course this means that there are only a few days to buy product from the Spring Mini! Boohoo! I am going to miss so much of it!

Till next time, happy stamping...

Wednesday, November 25, 2009

Almost stampless graduation!

The final challenge for the cyberstamp was an accent challenge. Amy Waters gave us a great tutorial on how to make these gorgeous flowers. Now if you are anything like me, you've looked at the picture and are thinking that I have put the wrong picture with this post.

Well no, I haven't. I just looked at the flower and thought that would make a fantastic laurette ribbon. Now please correct me if I am wrong, with the laurette name....
Tanya Kitto had also put out a challenge to use a rub-on in a project and I thought that I would combine the two challenges together! Are you wondering where I got the "Congrats, Grad!" rub-on from? That's right, it's from the new summer mini.


I was pleased with the final effect of this card and also with everything that I had achieved in one weekend - okay I did finish two projects on the Monday, but overall, these challenges and time frame gave me the incentive to finish a lot of projects. I don't think I have made this many wonderfully diverse things in such short space of time.

Card: Sahara Sand, Bravo Burgundy, Chocolate Chip, Brocade Blue
Ink: Versamark, Chocolate Chip
Embellishments: Chit Chat Rub-Ons
Stamp Set: Polka Dot Background

Till next time, happy stamping...

Monday, November 23, 2009

Scrapbook page challenge

Well if you know me, you'll know that I am not very confident with scrapbook pages. Actually I think its too big an area for me to deal with. There is a lot of space that needs to be filled.... I don't know how people can just whip up a page in a matter of hours - for me it takes days.

Anyway as I had challenged myself to enter every challenge from the cyberstamp. Carole Stedman set the scrapbook challenge. We had to include three items - photo, title and journalling. Easy I hear you say, then we also had a to include another seven things out of a list of ten. Okay so it helped fill the page, I'll agree. Anyway it took me two nights to plan this in my head and finally on the Monday afternoon (entries had to be in by 8pm) I threw this page together.


As you can imagine, I wasn't overly thrilled with the end result, but decided to enter it anyway. And you'll never believe but I won the challenge! I honestly think it must have been an encouragement award, as there were other great entries.

I also won the scavenger hunt on Sunday and to my surprise, I won the colour challenge as well. You can see my entry here.

Now are you wondering how I made the circles on this page? I used our circle scissors which are coming out in the summer mini on 1st December 2009. I had not used them before and I was so surprised at how simple they were to use. I love the fact that you get to decide the size of your circle, and you can make rings etc.

Okay so you know I wasn't happy with my page! And things like this seem to nag me.... even though the challenge was over and I had won, I still didn't think it was good enough. Suddenly one night it came to me that I should stamp some images from Circle Circus and fill in that wide open empty space that had been taunting me. And here is my stepped up version;


Card: Real Red, Tangerine Tango, Whisper White
Ink: Riding Hood Red, Tangerine Tango, Baja Breeze, Pacific Point
DSP: Ski Slope
Ribbon: Pretty in Pink 1/4" grosgrain, Real Red 3/4" Polka Dot grosgrain
Punches: Scallop Edge Border, Scallop Circle, 1/2" Circle, 1" circle, 1 3/8" Circle
Embellishments: Flower Fusion, Button Bouquet
Tools: Circle Scissors

Till next time, happy stamping

Sunday, November 22, 2009

Cyberstamp Christmas Challenge

So things have been plodding along nicely for me last weekend. I was slowly getting through all the projects. I had made it my personal challenge to try join in EVERY challenge for the weekend. And boy, did I achieve a lot!

Tanya Kitto was in charge of the Christmas card challenge. She decided to ask us to make a Christmas card without using a stamp set designed for Christmas. Although we were allowed to use the greetings from a Christmas stamp set.


I love the Lovely As A Tree stamp set and haven't really had an opportunity to make all the things that I want to with it. I had been meaning to try this shadow look for a little while, so I thought this was a perfect time to try it out. I had to have a couple of goes before I got it right. I didn't have a tutorial or anything, so had to work through this on my own. Finally I came up with the look I was after.

Card: Baja Breeze, Not Quite Navy, Riding Hood Red
Ink: Riding Hood Red, Night of Navy, Not Quite Navy, Whisper White
Punches: 1" Circle, 1/2" Circle
Tools: Heat Gun, Clear Embossing Powder, Sponges
Stamp Sets: Lovely As A Tree, Snow Swirled

Till next time, happy stamping...

Saturday, November 21, 2009

One layer card

Here I have made a one layer card, using the Season of Joy stamp set. I just love this set! It first became available in the spring mini last year and I was so glad to see it bought back into the current catalogue this year!


Now if you know this set, you'll realise that it already has a perfectly good Christmas tree in it, which I used here. However I decided to check out it's versatility and I used the flower stamp to build my own tree! This card was so quick to make and you don't need to own 'everything' to be able to make it.

Card: Whisper White
Ink: Summer Sun, Tangerine Tango, Kiwi Kiss, Riding Hood Red
Stamp Set: Season of Joy

Till next time, happy stamping...

Friday, November 20, 2009

A stunning bookmark

I know, I know, it's been a couple of days since I last got on here and gave you something new to look at. Well here is the first thing I made on day 2 of the cyberstamp. Jenny Adams gave us a tutorial on how to make these cute little bookmarks. Jenny's bookmark was done in the Christmas theme and was totally stunning. I can't seem to find it on her blog, but maybe she'll put it up there soon.

Anyway I have a wonderful friend who loves to read and I thought this would be a great Christmas present for her.


And one of the nice things about this bookmark, is that it opens and I have left enough space to write a personal message on the inside. Hmmm!!! What will I write? If her husband wrote in it, it would say, 'have you done the dishes yet?' lol. I think I will write something much more pleasant!


Now did you notice to gorgeous butterfly on the front? Have you seen them before? Well probably not, because that's one of the many gorgeous stamp sets that are coming out on the 1st December 2009, and YES it does have a co-ordinating punch. This new punch also co-ordinates with Flight of the Butterfly from the current catalogue. How exciting!!!!

I am excited about all the new products that are coming out on the 1st December in the summer mini catalogue, but it also means a very sad good bye to the spring mini. Have you got everything that you wanted from this mini, because there is only 10 more days to order from this!

Okay, now I have to remember everything I used to make this beautiful bookmark..... here goes;

Card: Lovely Lilac, Sage Shadow, Very Vanilla
Ink: Sage Shadow, Pale Plum, Lavender Lace, Perfect Plum
Punches: Scallop Edge, Scallop Circle, Butterfly, 1 3/8" Circle
Ribbon: Elegant Eggplant 1/4" grosgrain
Stamp Sets: Organic Grace, Butterfly Prints

Till next time, happy stamping...

Monday, November 16, 2009

3 Brad challenge!

Okay things we going swimmingly beautiful on day 1 of the cyberstamp. Okay I was probably ahead because I had already done my sketch challenge earlier in the week. Then out of nowhere, Tanya Kitto, decided to throw up a surprise challenge. We had to use three brads on a card. Pretty simple really!

Well I decided that I'd rework my sketch a little and turn it on it's side and I came up with this. Can you see my brads??? They are faux brads. Honestly I could have used real ones, but just thought that I'd buck the trend a little. It's that inability to follow directions to the tee, rearing it's head again!


This is a little brighter than cards I normally make - but I think it's cheery!

Card: Bordering Blue, Real Red, Green Galore, Night of Navy and Whisper White
Ink: Real Red, Versamark, Green Galore, Summer Sun (marker)
Punches: 1/2" Circle, Curly Label
Embellishments: Crystal Effects
Stamp Sets: Season of Joy, Cute & Curly

Till next time, happy stamping...

Sunday, November 15, 2009

Cyverstamp colour challenge

Okay we as promised yesterday, here is the next card from the cyberstamp. Claire Harrison put out a colour challenge. It was a doozy and took me a little while to come to terms with.

The colours were:
Pacific Point
Garden Green
Basic Grey and
Certainly Celery

These are definitely not colours I play with on a regular basis and would never have put them together myself. But I played along and this is my result.


The colours screamed 'MAN' and then I figured the Basic Grey could look like steel, so out came Totally Tools and I attempted to make a interior shed wall. What do you think?

Card: Pacific Point, Certainly Celery, Basic Grey, Garden Green
Ink: Pacific Point
DSP: Garden Green Patterns Pack II (hostess set)
Embellishments: Rich Regal Eyelets (retired)
Stamp Sets: Totally Tool, Sweet Little Sentiments

I hope to be back soon with more from the cyberstamp, but have to go now and prepare for another scavenger hunt!

Till next time, happy stamping...

Saturday, November 14, 2009

Cyberstamp Challenge

Hello my friends...

What an exciting week it has been for me! I woke up on Tuesday morning to a lovely email that
informed me that my last post was going to 'appear' on the Yahoo Group Late Night Stampers blog finds of the day for 12/11/09. Wow what a compliment! Thank you to Kelly Mayou who 'found' me!

Anyway us funloving gals who belong to the ESAD (Extremely Special Aussie Demonstators) group have been having a cyberstamp this weekend. Yep right now! We have been online and chatted and had a scavenger hunt and had challenges put out. I was asked to put up a sketch challenge which I did today, so I can now show it to you.

So this was my sketch.... my very first - I never really have to put it to paper normally, it's just up in the head..... you wouldn't beleive how many times I scrunch my brain up, like a peice of paper, and try and throw it out...lol! And here is my interpretation! Do you remember me telling you that I can never follow things exactly? Well I couldn't even follow my own sketch! How bad is that? lol.

It has been fascinating to see what others have made using this sketch. They are all very different and beautiful. I have a couple of other things to show you over the next couple of days, so keep your eyes peeled. I didn't want to overwhelm you with it all on one day!

Card: Pale Plum, Lavendar Lace, Sage Shadow, Whisper White, Glossy White
Ink: Stazon Black, Stazon White, Versamark, Perfect Plum, Sage Shadow, Pale Plum, Riding Hood Red (re-inker)
Ribbon: Whisper White 3/8" taffeta
Embellishments: Whisper White 5/16" Jumbo Brads, Pewter Build-A-Brad, Button Bouquet, White Gel Pen
Stamp Sets: Fifth Avenue Floral, Always, Always In Bloom Wheel, Think Happy Thoughts

Till next time, happy stamping...


Wednesday, November 11, 2009

Celebrate Christmas

Well can you believe that it's only 44 days to Christmas???? I certainly can't! If you are anything like me they days just seem to get away from you and suddenly important dates just arrive without much notice. Well it feels that way anyway! As a special help to you I have installed a Countdown to Christmas tree on my side bar, so if you need a bit of a shock feel free to come in and have a look at how many more days have passed.

Well I had a workshop today with some lovely ladies and since we are gearing up for the Christmas season, I thought that I would make a bon bon as a prize for a party game. I have put a dauber and a couple of flowers in as a gift to the winner.


Isn't it just divine? We are having a huge Christmas this year and it appears that I might have to make up about 25 of these. I am just going to go to the $ shop and get some little trinkets to put in. Just another thing to put on my never ending to do list! There isn't really much required to actually make these little beauties!

Card: Very Vanilla, Night of Navy
Ink: Old Olive, Ruby Red
Ribbon: Very Vanilla 1/4" grosgrain
Stamp Set: Season Of Joy

Anyway I hope to be back sooner than last time. I am so excited to be participating in a cyberstamp this weekend and I am even providing a sketch challenge. Yes, you guessed it - I have already got it organised but I can't show you just yet! This is my first challenge so I hope that it goes okay!

Till next time, happy stamping...

Tuesday, November 3, 2009

Easy Christmas card

Are you shocked like me? Have you suddenly realised that it's November and you haven't started on your christmas cards yet? Well I hadn't really either, so here is card number 1. I am running a christmas card making workshop this month, click here for more details.

I love the Ski Slope DSP, which is only available to end of this month. I know that I normally use DSP as a background filler, but I thought that this gorgeous DSP was begging to be embossed on. It certainly turned out better than I expected.


Card: Not Quite Navy
Ink: Versamark, Not Quite Navy
DSP: Ski Slope
Ribbon: Whisper White Taffeta
Tools: Heat Tool, Embossing Buddy, Silver Embossing Powder
Embellishments: Pretties Kit
Stamp Set: Snow Swirled

Till next time, happy stamping...

Monday, November 2, 2009

I love scallops!

The title gives this post away. It's about scallops and who doesn't love them.? I know I do! I have made this Christmas card using two fantastic scallop punches. Yes, that's right - just two!


It just goes to show that there are many ways to use the same punch. I had seen the medallions before, but it wasn't until I received a card from my secret sister that I worked out how to do it. Her card was so nice that I have cased the layout above.

And here is a close up of the scallop medallion!


If you'd like to make this card at Stamp Club, please check out times on my event calender.

Can you believe that the Oval Scallop in the Spring Mini is going to be gone soon? I don't know how I will cope without it. If you haven't got one already, don't miss out - put your order in today!

SU is such a fantastic company and although we have the spring mini running, they have also introduced a Christmas Gift Giving Guide. They have gifts for Neighbours, gifts for Card Makers, gifts for Scrapbookers, Gifts and Kids and Teens and amazing Stocking Stuffers as well. It certainly sounds like they have everyone covered. To check out the Christmas Gift Giving Guide click here. And as a bonus if you spent AU$85 on product from this guide, you'll receive a FREE Scallop Square - now who wouldn't want one of those? You have until December 15 2009 to take advantage of this offer. I suggest you get in quick and start your Christmas shopping now!

Card: Whisper White, Real Red, Certainly Celery
Ink: Real Red, Chocolate Chip
DSP: I wish Simply Scrappin
Punches: Scallop Square, Scallop Edge
Stamp Sets: Weathered, Punches Three (hostess set)

Till next time, happy stamping...

Sunday, November 1, 2009

An easy gift to post!

Okay it's getting close to Christmas and my attention is turning towards what to do for the grandparents. I am not sure about your family, but our grand kids are adored in ours. Grandma and Nanny are often talking about what the kids have been up to or in the case of my kids chatting to them on the phone, or listening to them read stories. Unfortunately for us we live too far away to be able to spend each Christmas with our extended families. So I thought this year I would case a gift that was given to me by my previous Secret Sister, Dianne Spies.

This is a little brag book - I am sure that given a few weeks in granny's purse it may not look the same and be like that favourite book we all used to read over and over again as kids.


So the picture above is the closed version and below is the fully opened view.

Now as you can see it has three sections and a slip for each one. The sections fold out, so you can put a photo on either side of the slips, holders and one on the red section behind the holders. All in all this little beauty will hold 15 photo's.


This was really easy to make and didn't take very long at all. I love the simplicity of it!

Card: Real Red
Ink: Baja Breeze, Real Red
DSP: Ski Slope
Punches: Eyelet Border, 1" Circle, 1/2" Circle, Round Tab
Ribbon: Whisper White Taffeta
Envelopes: Note card
Stamp Sets: Season Of Joy, Snow Swirled

Till next time, happy stamping...

Wednesday, October 28, 2009

A card for my real sister!

I know that I have been chatting a lot recently about my Secret Sisters, but I actually have real ones too. And I love them dearly! It happens to be one of their birthdays today and I have whipped up this card for her.


A fabulous lady from ESAD, Cathy Clarke, has recently given us a tutorial on how to make faux paper, so I thought I'd try it out on this card. What do you think? The possibilities are endless and I think you might see a few different combinations over the next few weeks.

Also Leonie Schroder from ESAD gave us some tips and ideas on how to use glossy cardstock, so I have stamped my rose image on glossy card and coloured in using circular motions with a sponge dauber. It was so easy and the result is fantastic.

Card: Whisper White, Pixie Pink, Orchid Opulence, Glossy White
Ink: Orchid Opulence, Pixie Pink, Stazon White, Regal Rose
Punches: Small Oval, Large Oval
Stamp Sets: Fifth Avenue Floral, Short and Sweet Baroque Motifs

Till next time, happy stamping...

Monday, October 26, 2009

3D book with co-ordinating Love Notes

I know it's been nearly a week since I posted, but I have been busy with classes and secret sister stuff. Hopefully I can start to put some more posts up on here soon.

Anyway the image you can see below is one of the classes that I am running this week. This 3D book can be filled with anything. Sweets, ribbon, brads, or even the love notes that I have made. The perfect packaging for book lovers!


These sweet little love notes were 'case'd from my previous Secret Sister, Dianne Spies. I loved her work, however had to make them a little smaller to fit in the book. To see Dianne's work, click here.

I am really loving the Oval All stamp set and Scallop Oval punch that are available in the Spring Mini catalogue. I know that I'll be using them for years to come! These are only available till 30th November 2009 so I encourage you to buy them, as I am sure that you'll love them as much as I do.

Card: Kiwi Kiss, Riding Hood Red, Whisper White
Ink: Pink Pirrouette, Kiwi Kiss, Riding Hood Red
DSP: Bella Rose
Ribbon: Kiwi Kiss/Very Vanilla Satin, Riding Hood Red Taffeta
Punches: Corner Rounder, Scallop Oval, Large Oval
Tools: Spritzer, Stampin' Write Markers

For more information on classes that I am running, please check out my events calendar.

Till next time, happy stamping...

Tuesday, October 20, 2009

October class

Hello. I thought it was about time that I stopped showing you things that I made for my Secret Sister Kim, and finally show you what I have been doing lately.

Well the picture below is from one of my October classes. I am really enjoying the versatility of these folded cards. For this class the students (hello ladies!) got to make two of each card.

I had all the peices pre cut and scored and the flower was pre-dyed. The rest was left up to the class. We did daubing, punching, cutting and thumping. We trialled quite a few different techniques.


Now I know that you think I am being a bit slow on the things that I have been making lately. However I have been very busy in my little crafting area. I am just making lots for my current Secret Sister and I can't show you a thing. Be warned though, I have already started getting each post ready for item that I have sent. They are just being scheduled to come up mid January - I know it's a long wait but at least you can be sure you'll see it all. Along with historical commentary of what is happening at the time I made the card.

Girly card ingredients...

Card: Basic Grey, Regal Rose, Baja Breeze, So Saffron, Very Vanilla
Ink: So Saffron, Regal Rose
DSP: Walk In The Park
Embellishments: Pretties Kit
Stamp Set: Great Friend

Manly card ingredients...

Card: Chocolate Chip, Close to Cocoa, Creamy Caramel, Not Quite Navy, Really Rust
Ink: Chocolate Chip, Creamy Caramel, Not Quite Navy, Really Rust
Embellishments: Hodge Podge Hardware
Stamp Set: Sense of Time

Till next time, happy stamping...

Sunday, October 18, 2009

Where is the picture from?

Hi everyone,

Well this post is a response to a question from a lady named Wanda. Wanda wanted to know where the photo at the top of my blog was taken.

I took this photo in April 2007 at Port Campbell, Victoria, Australia. For those that know a bit about Port Campbell you will know it is on part of the Great Ocean Road and is where the 12 Apostles are.

I love this picture because in the foreground is still water, but behind it is the raging Southern Ocean. It kind of reminds me of me..... I might appear calm, but if you look a little deeper you'll find something wild and uncontrollable.

I apologise for not putting much up here of late, but I am busy preparing for my current round of Secret Sister and workshops.

Wanda, thanks for visiting my blog. I will endeavour to answer any questions and comments that may be left. So please ask away.

Till next time, happy stamping...

Wednesday, October 14, 2009

Simply Sweet card

Okay, so here I am again with yet another card that I sent to my SS. Wasn't she spoilt?

I vaguely remember trying to copy a layout from another card, and this was the final product and it looked nothing like the original, after I had made my changes. This seems to happen to me all the time, but that's what I like about cardmaking. The fact that anything goes!


Card: Pink Pirrouette, Pumpkin Pie, Whisper White
Ink: Regal Rose, Kiwi Kiss
DSP: Sweet Always
Punches: Eyelet Border, Large Oval, Scallop Oval
Embellishments: Flower Brads, Stampin Pastels
Stamp Set: Simply Said

Till next time, happy stamping...

Monday, October 12, 2009

Birthday box

Well Kim couldn't have a birthday without a little treat from me. I made this 2-5-7-10 box for her and put some yummy choccies in it.

There are so many beautiful boxes available to make and I have found that if you take your cardstock and stamp over it first, it makes it much more interesting. I used the Always in Bloom wheel on this one.


Did you notice that I have finally worked out how to do a watermark? Joining Stampin' Up! ® has not only encouraged me to learn more papercrafts, but given me the confidence to learn how to blog and use my computer more effectively. Just another hidden benefit of Stampin' Up®! Now I will have to go back and redo all the pictures on my blog to date - oh what a job! Also this week I have worked out how to schedule posts for a later date. So was I really home when I posted all those previous posts? You'll never know.

Card: Lavender Lace, Whisper White, Almost Amethyst
Ink: Versamark, Lavender Lace
Ribbon: Purple and White organza - non SU
Punch: Eyelet Border
Stamp Sets : Always, Always In Bloom Wheel

Till next time, happy stamping...

Saturday, October 10, 2009

Bella birthday

Here's another card I made for, yep - you guessed it, my SS, Kim. It was her birthday, so I thought I'd try something a little different. Now this card looks quite plain on the front, but sometimes simple equals elegant.


On the inside of this card was a little surprise. It was a pop up card, which looked like a tower of presents. Please excuse the toe in the photo (it was very difficult to photograph without capturing shadows). I am glad my polish nearly matched the card.


So isn't this just a nifty thing, this secret sister society. It's easy to join - you just need to join the SU family and the fantastic ESAD (Extremely Special Australian Demonstrators) online group.

SU have a fantastic promotion at the moment. If you join before 31st December 2009, you will receive a Pretty in Pink Classic Stampin' Pad and package of Raspberry Tart Designer Series paper for free. And SU will donate $5 to National Breast Cancer Foundation (AUS). Email me for more information.

Card: Riding Hood Red, Very Vanilla
Ink: Riding Hood Red
DSP: Bella Rose
Ribbon: Riding Hood Red 3/8" taffeta
Punches: Large Oval, Scallop Oval
Stamp Set: Short and Sweet

Till next time, happy stamping...

Friday, October 9, 2009

No stamping?????

Yes, I made something without stamping! I must have been going through withdrawals on this day.

I made this bright concertina folder for my SS. I found some instructions on the net, but had to change them to fit my gift inside and of course, I have been very bad and not kept them. I will learn one day, never to let the kids get to all my scrap bits of paper with important crafting information on them.


There was some cutting out from the Good Morning Sunshine DSP, which took me back to kindergarten. I don't own the corresponding stamp sets, Cheep Talk and Good Friend, for this DSP, but my cut outs worked perfectly.

My SS listed gardening as one of her hobbies, so I thought that I would buy her some seeds, which fitted perfectly into my re-adjusted concertina folder.


Card: Soft Sky (retired), Summer Sun, Pacific Point
DSP: Good Morning Sunshine
Punches: 1" Circle, Scallop Circle, Corner Rounder
Embellishments: Chunky Glitter

Till next time, happy stamping...

Thursday, October 8, 2009

Diamond fold card

Well as promised here is another card that I made for my Secret Sister. This was one of the very early ones that she received.

It is called a Diamond fold card and is really simple to make.


As you can see in the picture below it opens out quite snazzy.

I did use a DSP on the triangle folds next to the back rectangles, but you can't see from these pictures. Sorry. As you probably have noticed my photography has improved somewhat over the last couple of months and since I sent this away, I have nothing to take extra photo's of.


I was really organised when I made all of Kim's cards and gifts wrote all of the ingredients down. I also send Kim the links to where I had obtained my tutorial from, but I didn't note these, so I apologise to the author and also to my followers.

Card: Cameo Coral, Chocolate Chip, Pink Pirrouette
Ink: Chocolate Chip
DSP: Berry Bliss (retired - lucky you can't see it...lol)
Stamp sets: Circle Circus, Echoes of Kindness (hostess set)

Till next time happy stamping

Wednesday, October 7, 2009

I was spoiled by Dianne Spies

Well I have shown you a couple of things that I made for my Secret Sister in Round 1. Now it is time to see my final parcel contents.

Firstly there was this adorable bag made by Di. I was entranced by the bag, but was thrilled when I opened it to find my very own scallop edge punch. I jumped up and down with glee to receive that.


This bag was made using:

Card: Pacfici Point, Whisper White
Ink: Pacific Point, Tangerine Tango, Kiwi Kiss, Riding Hood Red, Pink Pirouette
Punch: Scallop Square
Ribbon: Pacific Point 5/8" Striped Grosgrain
Stamp sets: Seeing Spots, Say It With Scallops


Next was this adorable card, which Dianne 'revealed' herself to me.

Card: Very Vanilla, Perfect Plum, Always Artichoke, Really Rust
Ink: Perfect Plum, Always Artichoke, Really Rust, White Stazon
Punches: Eyelet Border, Scallop Circle
Ribbon: Elegant Eggplant 1/4" Grosgrain
Embellishments: Button Latte, Linen Thread
Stamp sets: Polka Dot Background, En Francais, Fresh Cuts


Finally there was this adorable little gift bag, filled with these sweet little Love Notes. The concept for the gift bag was delightfully simple, yet stunning.

Card: Not Quite Navy, Kiwi Kiss, Whisper White
Ink: Stazon White, Basic Grey, Kiwi Kiss, Not Quite Navy, Baja Breeze
DSP: Urban Garden
Ribbon: Basic Grey Taffeta, Baja Breeze 1" Double Stitched Grosgrain
Stamp Set: Pocket Silhouettes

I feel that I was spoiled by my Secret Sister, Dianne. The thing I love about the Stampin Up company is that all the demo's are there to share. It's a real friendly group of people, and it certainly does feel like a family, which means that having a Secret Sister doesn't feel strange.

So you think that was enough for me. I was pretty happy with it. But Dianne also spoilt my daughters by sending them their own parcel, with a teddy inside. Now they will not go to bed without their teddy from their Secret Aunty.

Anyway I will be back soon with more from the past three months. I'd love to show you projects I am working on now but they are for my new Secret Sister, so you'll just have to wait.

Till next time, happy stamping...

Tuesday, October 6, 2009

Triple butterfly

Well as promised I am back with a card I made for my SS way back. This was the first card I made using the Great Friend stamp set from the Spring Mini and I still like it.


I used the rock and roll technique on the centre butterfly, so that the colours graded from Apricot Appeal to Ballet Blue.

Card: Kiwi Kiss, Baja Breeze
Ink: Versamark, Ballet Blue, Apricot Appeal, Pacific Point
DSP: Good Morning Sunshine
Punches: 1" cirlce, Oval Scallop
Stamp Set: Great Friend

Till next time, happy stamping...

Sunday, October 4, 2009

The contents of the box revealed

Now I know that I have been gone for over a fortnight, and the suspense may have been killing you. The box in the previous post, was the final parcel to my Secret Sister. Her name was Kim Conway and I really enjoyed thinking of new things to make for her.

So the first thing to show you is this fantastic stationary box. I made this using the "I Wish" Simply Scrappin Kit.


I followed the tutorial by Jackie Topa. It was quite simple to make and a lot of fun.

Using the Simply Scrappin Kit I was able to make a heap of cards, tags and love notes to go in this box. I honestly think that is a fabulous idea for a gift for the person who you don't know what to buy.


Kim has a bundle of kids, so I made them all an individual little pocket, with a personalised tag on the front, with a freddo frog in it.

I originally bought the "All In The Family" stamp set before I even joined SU, but hadn't quite worked out how to use it. Now that I have my trusty Stamp-A-Ma-Jig, I was able to put these little tags together quite quickly.


And of course, we couldn't forget a choccie for Mum and Dad, so I whipped up this cute little toblerone case.


And finally my favourite thing in the box. Yet another waterfall card. I love them. This one was made using the Walk In The Park DSP and co-ordinating Great Friend stamp set from the Spring mini.

I used the Build-A-Brads for this project and I love them. They finish a project off beautifully.


So there you go. That was what was in the box for my SS. I hope you enjoyed unveiling these all as you read down the post, as much as I enjoyed making them.

I will be back soon with some more of my creations from the last three months.

Till next time, happy stamping...


Related Posts Plugin for WordPress, Blogger...